Everything related to connecting Lookify to other software now lives in one place: the new Integrations page. It replaces the old single API page in the dashboard, and it is organized into two groups — Connect (REST API, Zapier, MCP) and Settings (API Keys, Usage). Existing links to /dashboard/api redirect to the new page, so bookmarks will keep working.
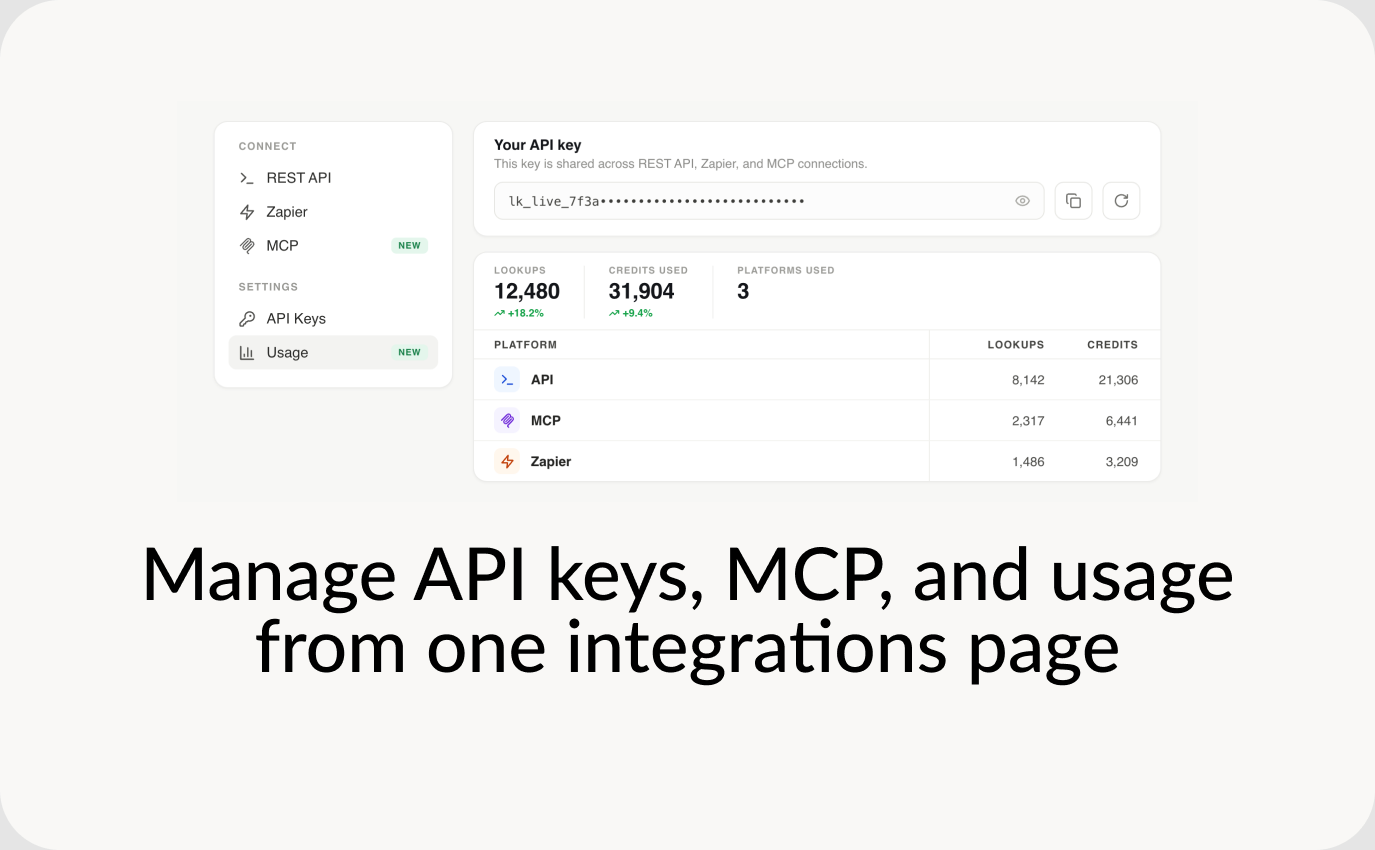
Three things are new here: an MCP connector, a dedicated API keys page that makes it obvious which credentials each service expects, and usage reporting broken out by platform.
MCP: connect Lookify to AI assistants
Lookify now runs a remote MCP server, which means AI assistants that support the Model Context Protocol can query phone number data directly in a conversation instead of you copying results back and forth.
The server exposes two tools:
phone_lookup— looks up a phone number and returns any combination ofcarrier(line type and carrier name),threat(the Lookify Threat Score), andprofile(name, address, emails, work history, and social presence). Credit costs are the same as everywhere else: carrier is 1, threat is 2, profile is 20.check_credits— reports the credits remaining on your account, so an assistant can check its budget before running a batch of lookups.
Setup is two values, both on the MCP page: a server URL and an MCP API key. You add the server URL as a remote MCP connector in your client, and paste the MCP API key when the client asks for authentication. The page links to setup instructions for Claude, ChatGPT, Perplexity, and Cursor, but anything that supports remote MCP servers will work — there is nothing client-specific about the connection.
A practical note on what this is good for: MCP is convenient for exploratory and ad-hoc work — checking a handful of numbers while you are already in a conversation, or having an assistant screen a list you pasted in. For high-volume or scheduled work, the REST API is still the right tool. The MCP server is a wrapper over the same endpoints, so the data is identical either way.
API keys, and which key goes where
Lookify uses one API key for everything, but each service asks for it differently. Zapier wants a username and password. The REST API wants HTTP Basic Auth. MCP wants a single encoded token.
The API Keys page is now the one place to generate, view, copy, and rotate that key. It is masked by default with a toggle to reveal it, and the card states plainly that the same key is shared across REST API, Zapier, and MCP connections.
Then each integration page shows the credentials in the exact shape that service expects:
- REST API shows your account email as the username and your API key as the password, ready to drop into curl, an SDK, or an API client.
- Zapier shows the same pair, labeled the way Zapier's connection dialog labels them.
- MCP shows the encoded MCP API key, which is what an AI client wants when it prompts for authentication.
Every field has a copy button, so there is no re-typing or guessing which half of a credential goes in which box.
Rotating a key is on the API Keys page behind a confirmation dialog. Rotation takes effect immediately — the previous key stops working the moment you confirm, and any integration still using it will need to be updated. There is no grace period, so rotate when you have a few minutes to update your Zaps, scripts, and MCP clients rather than in the middle of a run.
Track your usage by platform
The Usage page answers the question that previously required exporting data or asking support: where are my credits actually going?
At the top are three totals for the selected period — lookups, credits used, and platforms used — with lookups and credits each compared against the prior period of the same length, so a spike or a drop is visible without doing arithmetic.
Below that is a per-platform breakdown with lookups and credits for each of API, MCP, Zapier, Web, iOS, and Android. This is the part that makes runaway automation easy to spot. If a Zap is firing more often than you expected, or a script is re-running lookups it already has, the platform row will show it well before the credit balance does.
You can scope the view to today, yesterday, the last 7 days, the last 30 days, or a custom date range, and filter down to a single platform.
Getting started
If you already have an API key, nothing changes about how your existing integrations authenticate — the same key keeps working, and usage history is already populated. Head to the Integrations page to see the breakdown.
If you want to try the MCP connector, start on the API Keys page to generate a key if you do not have one, then follow the steps on the MCP page.
There is a Leave feedback link at the bottom of the integrations sidebar. If something about the layout, the usage numbers, or the MCP setup is unclear or wrong, that link is the fastest way to tell us, and it goes to the people working on this page.